Yesterday, I let you in on how our family is currently storing water and what our future goals are (I have my eyes on you, 55 gallon drum!). I forgot to mention that once we build our dream home, hopefully in the next few years, we plan to engineer a rain water catch system. Rain water can be used to water plants and gardens, but if adequately filtered and treated , can also be used for drinking water in an emergency situation for your pets or yourself. All of that rain water running off of our roofs, into the gutters, and onto the ground going to waste!
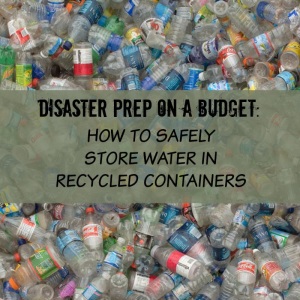
I left off yesterday briefly explaining that we reuse 1 and 2 liter soda bottles for water storage. This is a convenient, cost effective, and durable manner to store your water. IF you are going to reuse containers, there are a few ground rules as well as strict cleaning and sanitizing guidelines to follow.
To start, DO NOT use milk jugs or bottles that contained fruit juice for water storage. The milk proteins and fruit sugars are difficult to completely remove from the bottles and given time, will create a hot bed for microbial growth that will contaminate your water and potentially make you sick. We don’t want that.
The following cleaning and sanitation instructions are straight from FEMA and the American Red Cross and are accepted across the prepping ‘verse:
Prepping Containers:
1.) Thoroughly clean the container with dish washing soap and water. Rinse completely so there is no residual soap.
2.) Create a sanitizing solution by combining 1 teaspoon of non-scented liquid household chlorine bleach (cheap at discount stores) to a quart (1/4 gallon) of water.
3.) Swish the solution in the bottle so that it touches all surfaces.
4.) Rinse the bottle with clean water, let dry completely. I wait until I have a large number of bottles, at least 10, before I start to clean and sanitize that way I can reuse the sanitizing solution in the bottles I have for that day.
Filling Water Containers:
1.) Make sure your hands and working surfaces are clean. I recommend wearing gloves and rubbing them with hand sanitizer. You don’t want to contaminate the lid with your dirty hands when you are recapping.
2.) Fill the bottle to the top with tap water from your sink. If your water utility company treats with chlorine, there is no need to add anything additional to keep it safe and clean. Most cities and companies have this information on their website, if not, a quick call to the water company and you’ll have your answer 🙂
If the water you are using comes from a well or another water source that has not been treated with chlorine, add two drops of non-scented liquid household chlorine bleach to each gallon of water. (2 liters is ~1/2 gallon, so 1 drop of bleach for each two liter bottle is sufficient)
3.) Tightly close the container using the original cap. Do not touch the inside of the cap, again we don’t want to contaminate!
4.) Write the date on the outside of the container. Store in a cool, dark place.
If you want some added protection, you can wrap the lid with Parafilm to get a good seal. This is a material we use in the biology and chemistry labs quite often.
5.) Replace the water every six months. If I have water coming up on it’s “expiration”, I just refill our dogs’ automatic water bowl with it, re-clean, re-sanitize, and refill!
In a nutshell, that’s how we prep and store our water. Simple, cheap, and effective…three of my favorite things!


So my husband really is the prepper in the family and he had this 7 gallon water container on his list.
http://www.amazon.com/dp/B000GKDFH4/ref=wl_it_dp_o_pd_nS_ttl?_encoding=UTF8&colid=2FQ2UX19VMJVK&coliid=ITTPR9S8J10S1
I just quizzed him on his choice (he was so pleased I took an interest it was hard to get him to stop talking!) He says 60ish lbs it’s heavy but not so heavy you cannot move it if you need to take it with you or fill it up and take it home. We could fit 4 in our fold-able wagon. We started thinking about moving water when we were camping and had to keep running to the spigot to refill. It’s hard to carry water! In a situation where you just are at home that isn’t important but the versatility is nice. Also, it is a standard size to a “jerry can holder” to strap on to vehicles and what not. We haven’t bought them yet so it’s still just theory.
Also, have you used camelcamelcamel.com, it’s a amazon.com price tracker. It’ll alert you when the prices go down on things your tracking. It’ll also show the price history, that’s nice so you know if your getting a deal on it. We have many “prepper” items being tracked on this!
Sorry to go on and on!
LikeLike
You must be reading my mind because we just decided last night to start purchasing these:
http://www.amazon.com/gp/product/B001QC31G6?keywords=aqua%20tainer&qid=1449062826&ref_=nav_ya_signin&s=sporting-goods&sr=1-1
I carry 50 lb feed bags all the time, so 60 lbs shouldn’t be too different (although water moves a lot more while carrying than grain!) and doable. We are working with a $15 per week for prep materials budget right now so I plan to buy two of these this month. I will let you know how they work!
And no! I’ve never heard of the camel website – I will totally have to check that out, thank you for the info! Don’t be sorry to go on, I’m just so ecstatic that someone is actually reading my blog!! Can’t wait to read your reaction to today’s post!
LikeLike
[…] pop bottles, and a 7 gallon Aqua Tainer. I talk about my family’s water storage here and here. This is our #1 main priority, and it should be yours […]
LikeLike